The New York City Marathon is 40 days away (but who’s counting 🙂 ). That means about 30 days of training and 10 days of taper. For those of you running NYC or another fall marathon, here are a few ways to navigate these final weeks of training:
-Your main priority now is getting to the start line healthy, rested and excited!!Resist the temptation to overdo it or overtrain. No, now is not the time to add in a new strength program. And if your knee has been hurting for a few days, skip the workout and let it rest. In the final weeks, less is more.
-Trust the plan and have confidence in your training. Worrying if you should have done something different will only cause unnecessary stress. Your friend is running longer runs than you? It’s ok. That is their training. Know that YOUR training is right for YOU.
-Treat your remaining long runs as dress rehearsals for the big day. Practice running at the same time of day as the race, determine the best pre-race breakfast and fine tune your fueling strategy. It might sound silly but test out your outfit and shoe / sock choice during one of your long runs. Suprise chafing on race day is a total buzz kill.
-Celebrate the journey, the sacrifices, the miles logged and the memories made. Getting to the starting line is an accomplishment in and of itself. Be proud of how far you’ve come.
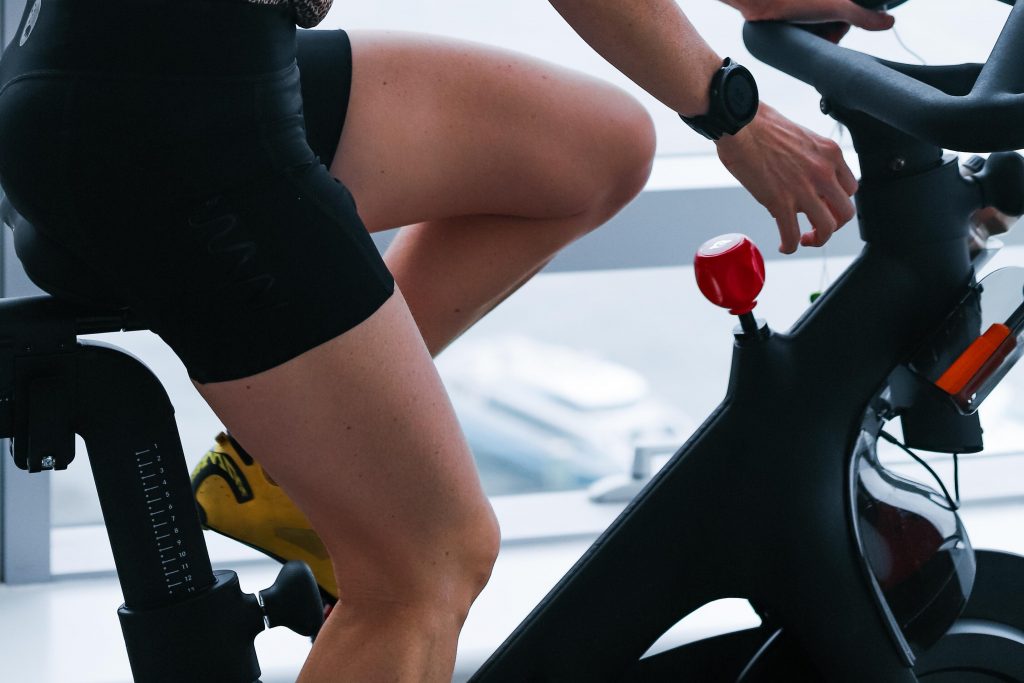
Thank you @gofastmommy for sharing your Team Wilpers Bike Fit experience, from how to schedule & how it works to the results. Please see Amy’s review below:
Does my Peloton look different to you? I FINALLY got a proper bike fitting done with Team Wilpers and YOU GUYS it’s incredible. I feel so much more secure and comfortable on my bike now and my pedals glide in full circles like butter hah. PLUS, and I know some of you will be super proud of me, I learned how to make clipping out so much easier now!!
I know so many of you are probably curious about how my fitting went so I am going to summarize here. I scheduled online at teamwilpers.com. After you pay you can read the bios and availability of all the fitters and schedule. I went with @bikefitdwayne and he was amazing – he took lots of time with me was so helpful, knowledgable and patient. I did my fitting using ZOOM and it took just over an hour. After making sure my camera was in a good position my fitter asked me lots of questions about riding and injury history and then watched me perform stability exercises and assessed my feet for imbalances.
Next we adjusted my cleats. We adjusted them to use my metatarsal system better, we later readjusted the right side so that my knee would track over my feet on the bike.
We the raised my saddle so that more of my muscles would engage during rides and to keep my pelvis more stable too. We also pushed the saddle forward to get my knees over pedals better. We raised my handlebar a lot to make my reach more effective and comfortable.
Then we worked on pedal technique to involve my glutes, hamstrings, calves and core better. We also discussed positioning cues and drills to engage more muscles, increase my power and keep me injury free.
The result? I feel so much more in control of my ride on the bike now- with these adjustments I honestly feel like this machine was custom built for me, which is pretty cool. I have been in a PR rut for quite some time and I’m sure with this new positioning and cueing my output and love of the bike will continue to soar!
Have you gotten a TW Bike Fit? If so, what results have you seen?
Let’s get something out of the way before we dive in: there is no such thing as a one-size-fits-all, perfect pedal stroke!
But, everyone has their own “perfect pedal stroke” and adding drills to your cycling sessions will help you find it. Drills are an opportunity to focus your efforts on one aspect of your ride. Working on pedal stroke promotes fluidity and leads to maximizing your efficiency and power on the bike.
You can do drills on easy rides or before or after a workout 2-4 times a week (professional cyclists and triathletes do these drills before almost every indoor ride).
So, let’s get to it! Here are three exercises to help get that smooth, pretty, and powerful pedal stroke.
Cycling Drills:
1. Spin-Ups
Spin-ups are a great way to learn how your body is moving on the bike. The intention with this drill is to be able to pedal as smoothly as possible without bouncing in the saddle.
To perform this drill, set your bike to a low resistance and aim for a cadence of about 100-110. Start slow with a smooth pedal stroke and keep your upper body still (i.e, no bouncing or rocking your hips in the saddle). Increase your speed while keeping your pedal stroke smooth. If you feel yourself start to rock, slow yourself down to the cadence where you were pedaling smoothly and pedal there for 1 minute. Take a minute recovery.
For your next rep, try to increase your cadence while still holding that smooth pedal stroke. Do 3-6 reps before or after a cycling session or during an easy ride.
2. Single-Leg Pedal Strokes
This exercise is ideal to practice on your indoor bike rides. The goal is to discover where your weaknesses are in each leg within the 360 degrees of pedal rotation and smooth out those weaknesses.
To perform this drill, have one leg clipped in to your bike and hold your other leg, unclipped, out of the way of the turning pedals. This will force your single clipped-in leg to do all of the work. Ensure that you are still balanced in the saddle when you work on this drill!
Once you are set up, pedal at a cadence of 70-90 on one side at low to medium resistance with the clipped in leg. Try to find your “perfect pedal stroke”. Keep in mind where your weaknesses are and focus on making micro-adjustments to your body so you can achieve a smooth pedal stroke throughout the entire 360 degrees.
Try 3 rounds of :30-60 on each leg.
3. Toe Touch
The intent of this drill is to mentally focus on your pedal stroke so that you can move faster on the bike.
To perform this drill, you will want medium resistance and low speed. When you are moving your foot through your pedal stroke, as you come through the top of your stroke, visualize pushing your toes to the front of your shoe. As you come to the bottom of your stroke, imagine pushing your foot back in your shoe. In other words, visualize back and forth, rather than up and down for your pedal stroke.
Increase speed as you get the hang of this drill. You should feel you are getting more power out of your pedal stroke.
Also, keep in mind that these drills are infinitely easier if you are riding a bike that fits your movement style. If you feel any instabilities while pedaling or the drills feel very difficult, check in on your bike fit or schedule a Team Wilpers bike fit. Our bike fitters are expert cyclists and can watch you pedal, analyze your pedal stroke and coach you through the drills.